Tutorial for the manicure:
For the base color I used I Only Drink Champagne by OPI, it's a gold champagne frosty color with hint of shimmer in it. Side note: the picture is old so don't assume I applied I Only Drink Champagne on all my nails. Swatches of I only drink Champagne using flash:


I bought the beads from Dollarama’s craft section ($1 for 6 bottles); you can
find these in most craft stores, dollar stores, ebay and etc for under $3


I used a separate container and added small amounts of all the color beads in it. Don’t forget to mix them after putting them in a small
container.


Steps:
1. I applied “I Only Drink Champagne” by OPI on all my fingers except for the ring finger and thumb. For stamping I used Konad plate m65 with red Konad stamping polish.(I posted the swatches of I Only Drink Champagne on top). How it looked after the stamping:
1. I applied “I Only Drink Champagne” by OPI on all my fingers except for the ring finger and thumb. For stamping I used Konad plate m65 with red Konad stamping polish.(I posted the swatches of I Only Drink Champagne on top). How it looked after the stamping:

2. Apply any black polish (I used Black Satin by Rimmel London) on your ring finger.

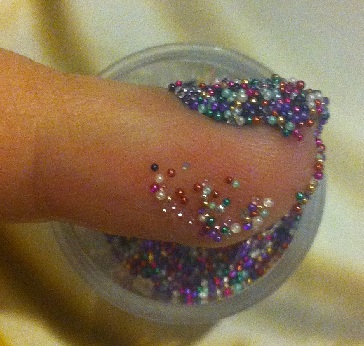
3. After you apply the polish dip your nail into the container;
in-order for the beads to stick to the nail make sure your nail polish is wet.

4. Using any paint brush, doting tool or your other finger
remove any access beads from top and under your nails. Side note: If you remove any beads that have nail polish on them don’t
put them back in the container.

6. For this step you need tape for your tips. Before applying the tape make
sure your nails are dry and the tape isn't too sticky (simply apply the tape on
your skin and remove it 2-3 times in-order to lose the stickiness). Apply the tape horizontally on your tips. Apply black nail
polish on your tips and dip them in the container (like you did on your ring finger and thumb but this time your are only applying the nail polish and beads on the tips).
Swatches of the final design:


Hope you enjoyed my post for today. If you liked it or hated it let me know in the comment section below.
love the idea
ReplyDelete